How to Set up React Native on Mac OS
For both iOS and Android OS
React native Developer, Life long learner, Jesus Christ lover.
If you need to develop an app for both iOS and Android, React Native is the best tool out there.
So you have a new MacOS and now you want to set up React Native on your new machine. This guide will walk you through with a straight to the point approach. No gimmicks.
If you use Linux OS, I've written this one here for you
We'll divide our set up into three
- General (For all platforms both iOS and Android)
- iOS Specific and
- Android Specific
P.S: Ensure you have a strong network connection and alot of data haha
General
Homebrew
The first thing is to ensure you have Homebrew installed. Open your terminal and type this:
$ brew --version
if you get
zsh: command not found: brew
then it means you don't have it installed.
Install Homebrew with:
/bin/bash -c "$(curl -fsSL https://raw.githubusercontent.com/Homebrew/install/HEAD/install.sh)"
It will prompt for sudo password(your mac/laptop password), enter it to proceed.
Then you should see this too
...
==> The Xcode Command Line Tools will be installed.

Press RETURN to continue or any other key to abort
Just press enter and continue
After installation, check your brew version by typing
$ brew --version
A succesful installation should output
$ Homebrew 3.1.3
Homebrew/homebrew-core (git revision 036b0409ce; last commit 2021-04-27)
Node
Next we have to install node. I prefer to install node via nvm(node version manager). With nvm, I can install and use any version of node at anytime.:
Install nvm
Run this on the terminal
$ curl -o- https://raw.githubusercontent.com/nvm-sh/nvm/v0.35.3/install.sh | zsh
Or this if you're using bash
$ curl -o- https://raw.githubusercontent.com/nvm-sh/nvm/v0.35.3/install.sh | bash
Once completed, close your terminal, reopen it and type:
$ nvm ls
If you get this error
....
 Profile not found. Tried ~/.bashrc, ~/.bash_profile, ~/.zshrc, and ~/.profile.
...
Then do this
$ touch ~/.bash_profile
Again, close your terminal, reopen it and type:
$ nvm ls
If you get the error
zsh: command nvm not found
Then type this:
$ source ~/.nvm/nvm.sh
This should fix it.
Running this again
nvm ls
should now output something like this
            N/A
iojs -> N/A (default)
node -> stable (-> N/A) (default)
unstable -> N/A (default)
nvm_list_aliases:36: no matches found: /Users/chidera/.nvm/alias/lts/*
This shows it has been installed successfully
Install node via nvm
To see a list of installable node versions, type this
nvm ls-remote
which should output
...
       v14.16.1   (Latest LTS: Fermium)
        v15.0.0
        v15.0.1
        v15.1.0
...
At the time of this writing, v14.16.1 is the Latest stable version so we install it
$ nvm install 14.16.1
Once completed, we use it like so:
nvm use 14.16.1
Let's confirm the node version installed
node --version
which outputs
14.16.1
Since npm comes with node, we also check it's installed version
npm --version
which outputs
6.14.12
Install Yarn
This is not compulsory as you can use npm for the same purpose, however, I personally just like using yarn.
$ npm install --global yarn
Watchman
Watchman is to watch specific folders or files, and if they are changed, it can trigger some actions.
Install watchman
$ brew update
$ brew install watchman
After installation, confirm watchman by
$ watchman --version
iOS
XCode
Install the more than 10GB+ XCode via the Mac App Store. When the page opens, click on "View in Mac App Store" or click on "Open App Store" in the ensuing pop up. Installing Xcode will also install the iOS Simulator and all the necessary tools to build your iOS app.
Disclaimer: At the time of this writing, I installed xcode 12.5 and it was having issues, this made me downgrade to xcode 12.4. If you experience issues to wit, your ios project wouldn't build, please see if you can downgrade to xcode 12.4. Or just proceed with downloading xcode 12.4. Follow this link to get the required 12.4 version
Configure Command Line Tools
To configure command line tools after installation of xcode,
- execute/open xcode, then
- from the xcode menu at the top left corner of your Mac, click on the
Xcode -> Preferences. - Once inside, you'll see a list of tab arranged menu, click on "Locations".
Once inside Locations, you'll see Command Line Tools, click on the input there and select the most recent, mine was Xcode 12.5 (12E262). Input your password when prompted.
If you installed
xcode 12.4, you should seeXcode 12.4 (...).
Install Cocoapods
Cocoapods is the dependency manager on iOS development. Install it with
$ sudo gem install cocoapods
After installation, check your pod version
$ pod --version
That's it for iOS installation, let's confirm it's working.
React Native Command Line Interface
Rather than install and manage a specific version of React Native CLI globally, it's recommended to access the current version at runtime using npx.
Let's create a new React Native project. First cd into any Directory of your choice. I'll use Desktop
$ cd Desktop
Then run the following
$ npx react-native init newProject
$ npx pod-install
Then finally
$ yarn ios
Or
$ react-native run-ios
If everything goes well, your react native project should come up in the simulator
Android
Install JDK
Install Java Development Kit (JDK) using Homebrew with the following command:
$ brew install --cask adoptopenjdk/openjdk/adoptopenjdk8
After installation, run this for confirmation
$ java -version
This should output
openjdk version "1.8.0_292"
OpenJDK Runtime Environment (AdoptOpenJDK)(build 1.8.0_292-b10)
OpenJDK 64-Bit Server VM (AdoptOpenJDK)(build 25.292-b10, mixed mode)
Java compiler comes installed with JDK, confirm this by
$ javac -version
Which shows
javac 1.8.0_292
Android Studio
Android Studio is used to develop Android Applications on Mac. Follow this link to download it.
Configure Android Studio
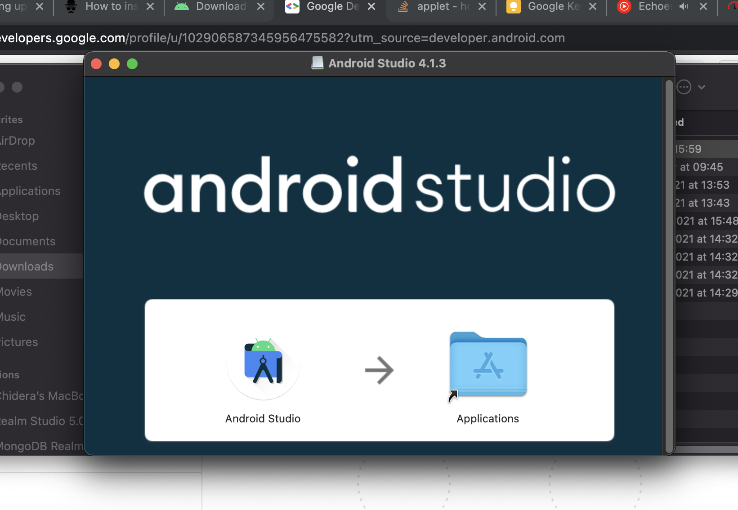
After downloading, the next thing is to configure Android studio. Double click the Android studio file in your downloads folder, after installation, you'll see a screen with the Android studio and Applicaations folder, drag the Android studio into the Applications folder.
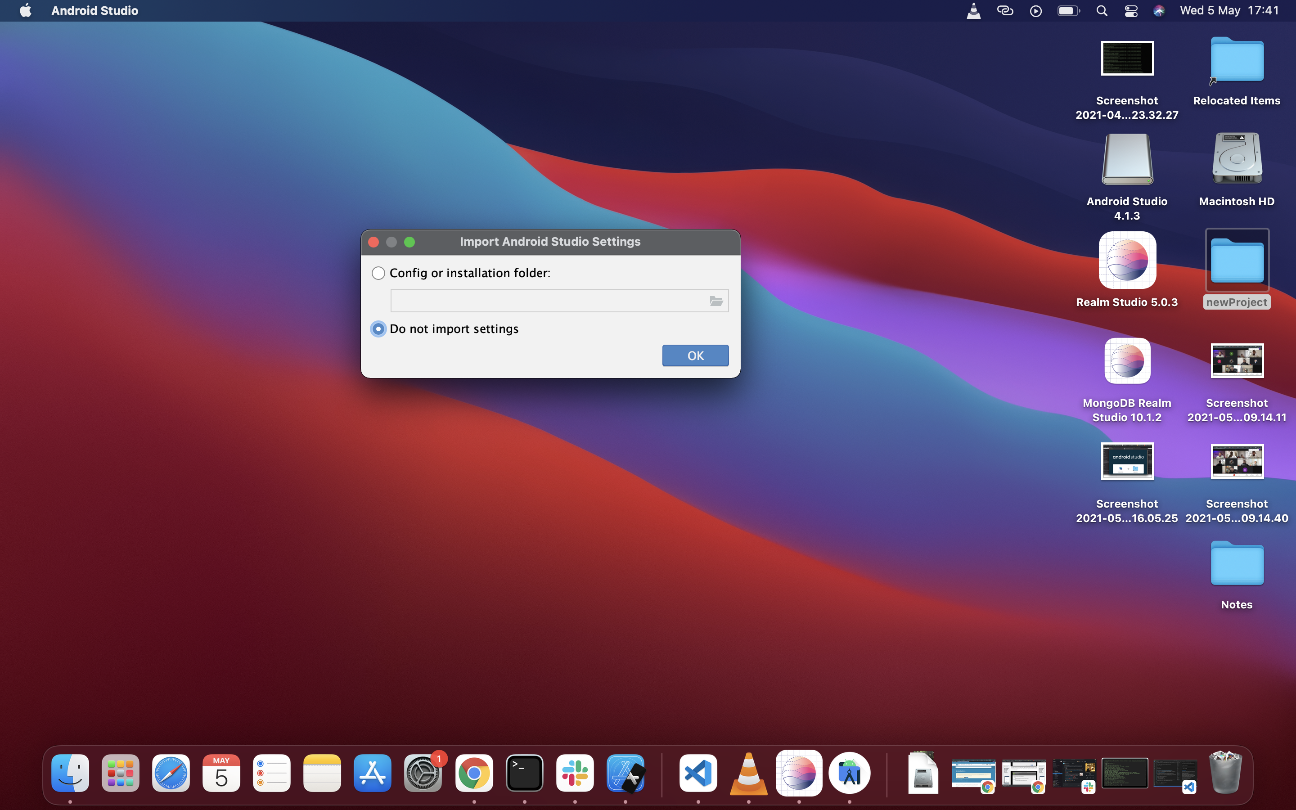
Now go to Applications and execute it.
It opens with two options:
- Config or Installation folder
- Do not import settings
Select the "Do not import Settings" and click Ok if you've not previously installed Android studio or do not intend to keep any previous settings
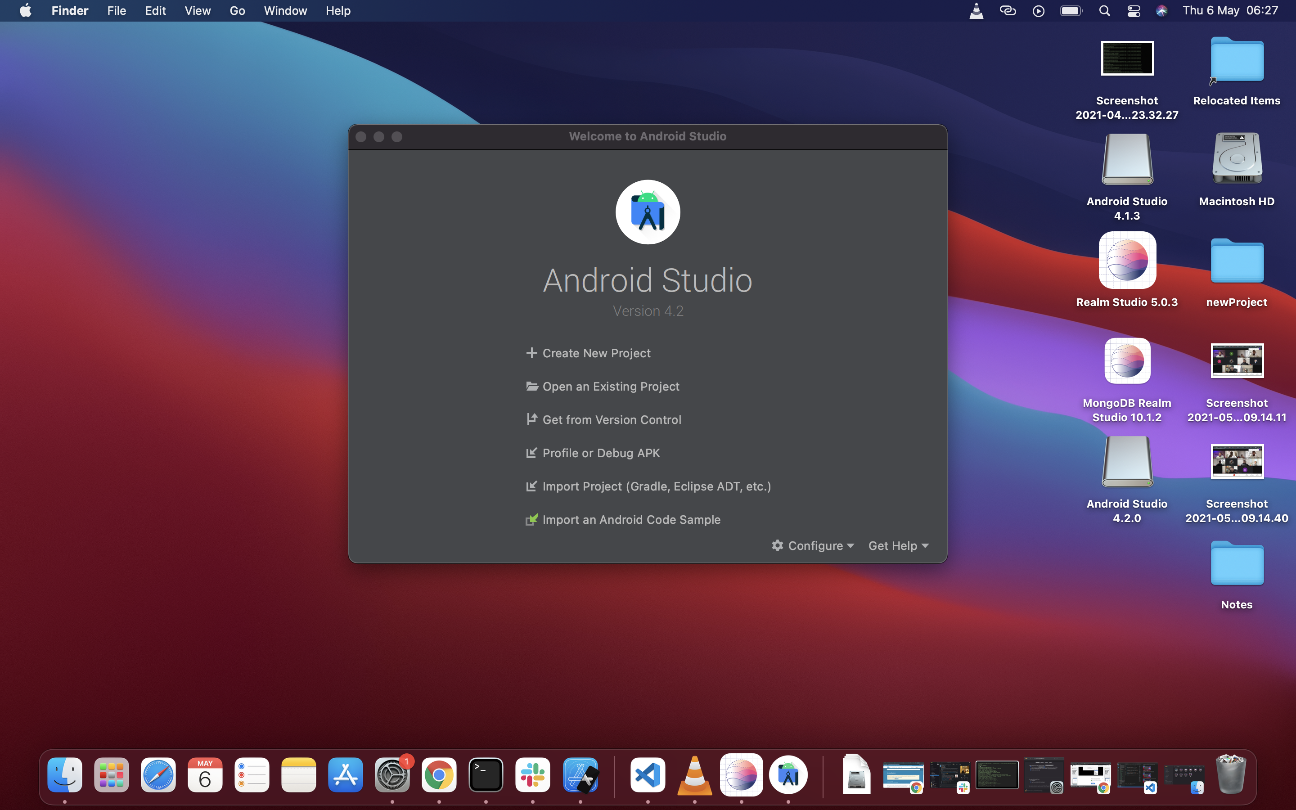
This should bring you to the welcome page
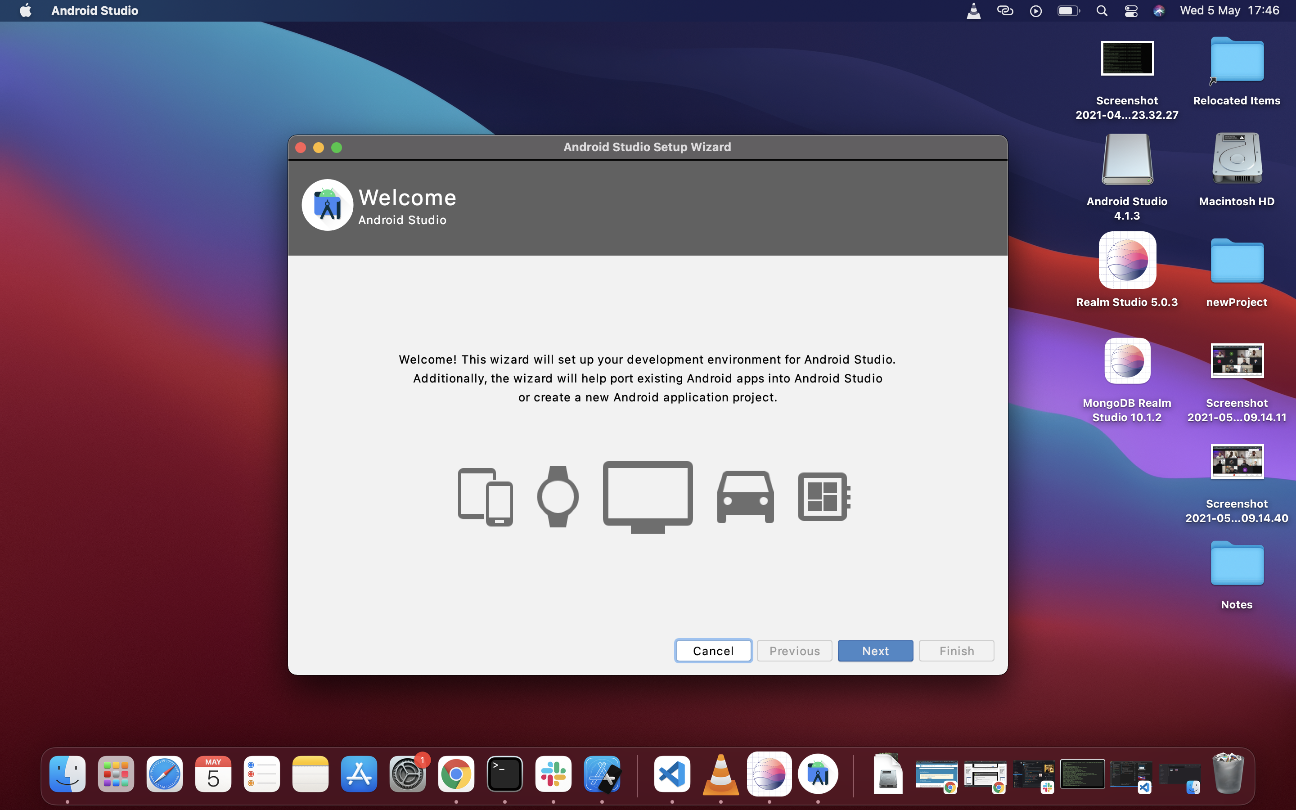
Click on next to go to the next page
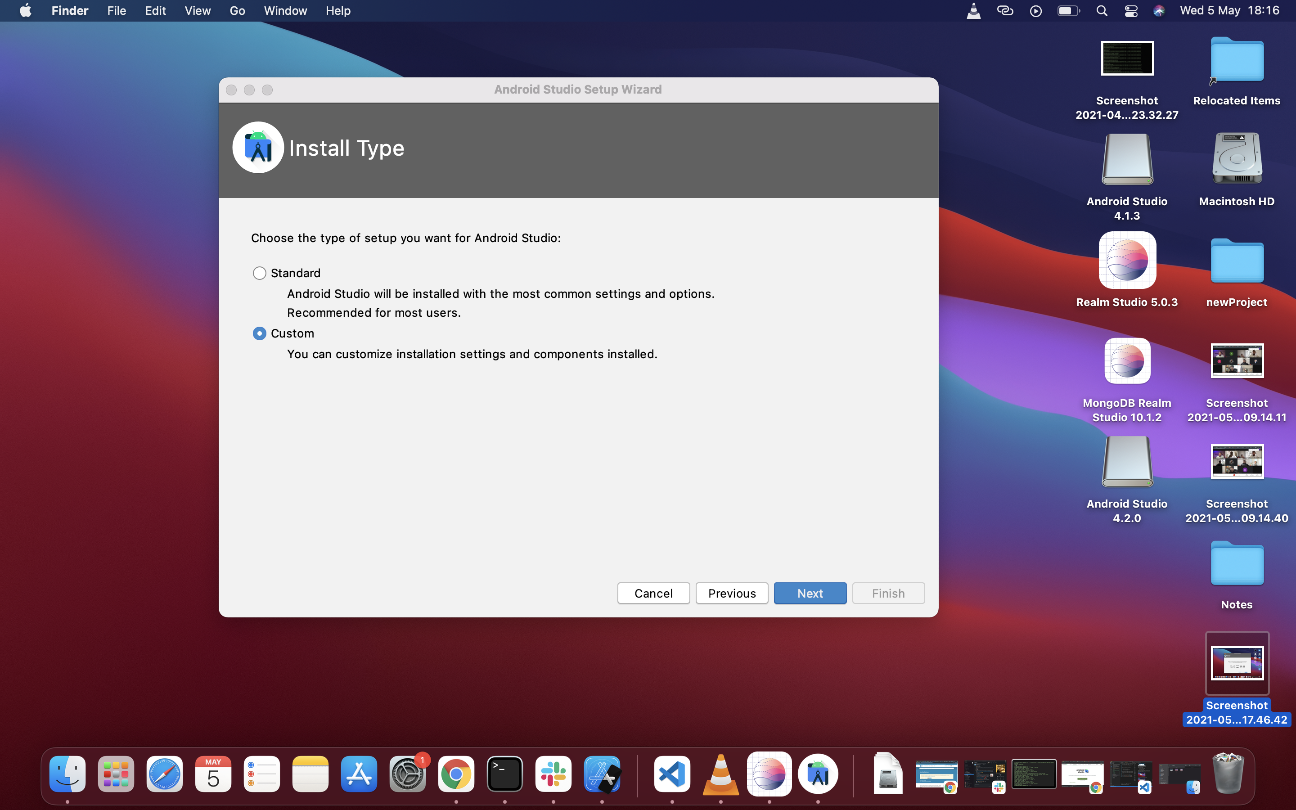
Select Custom and click Next
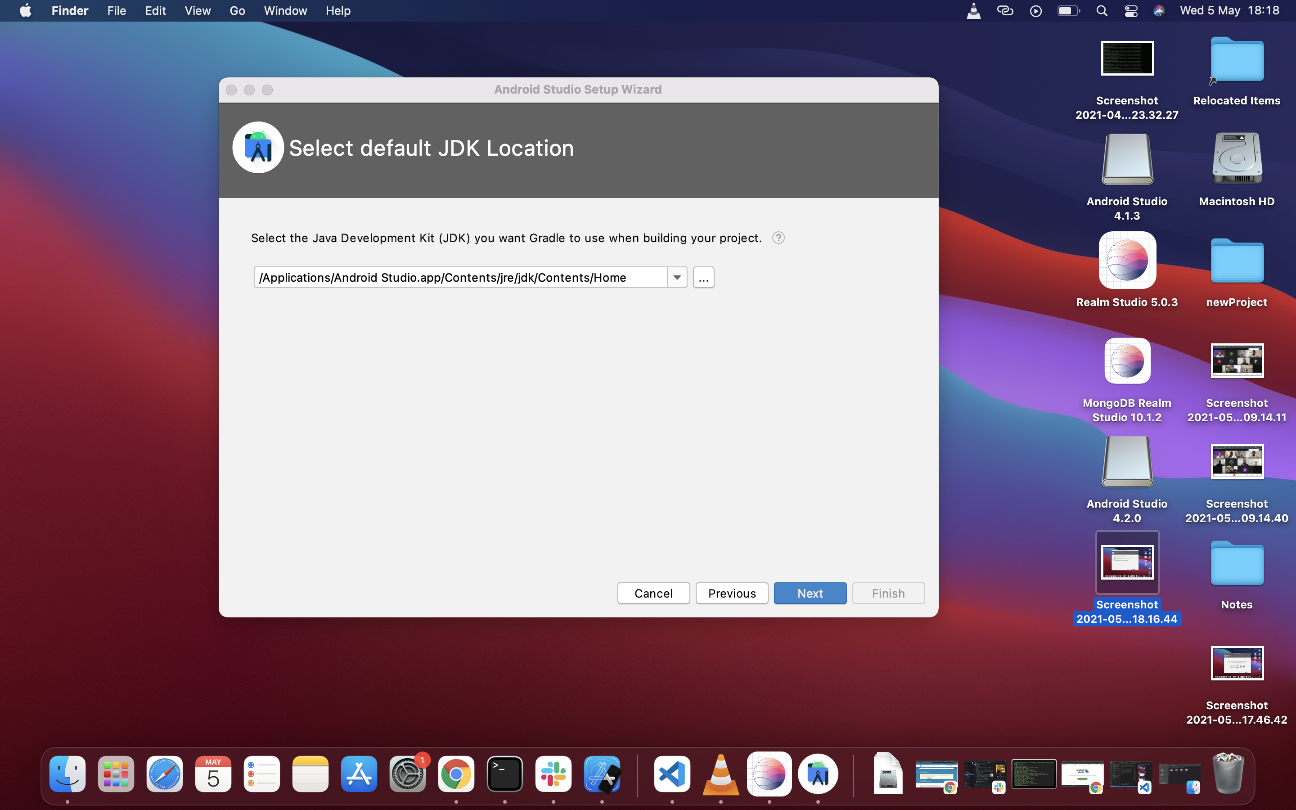
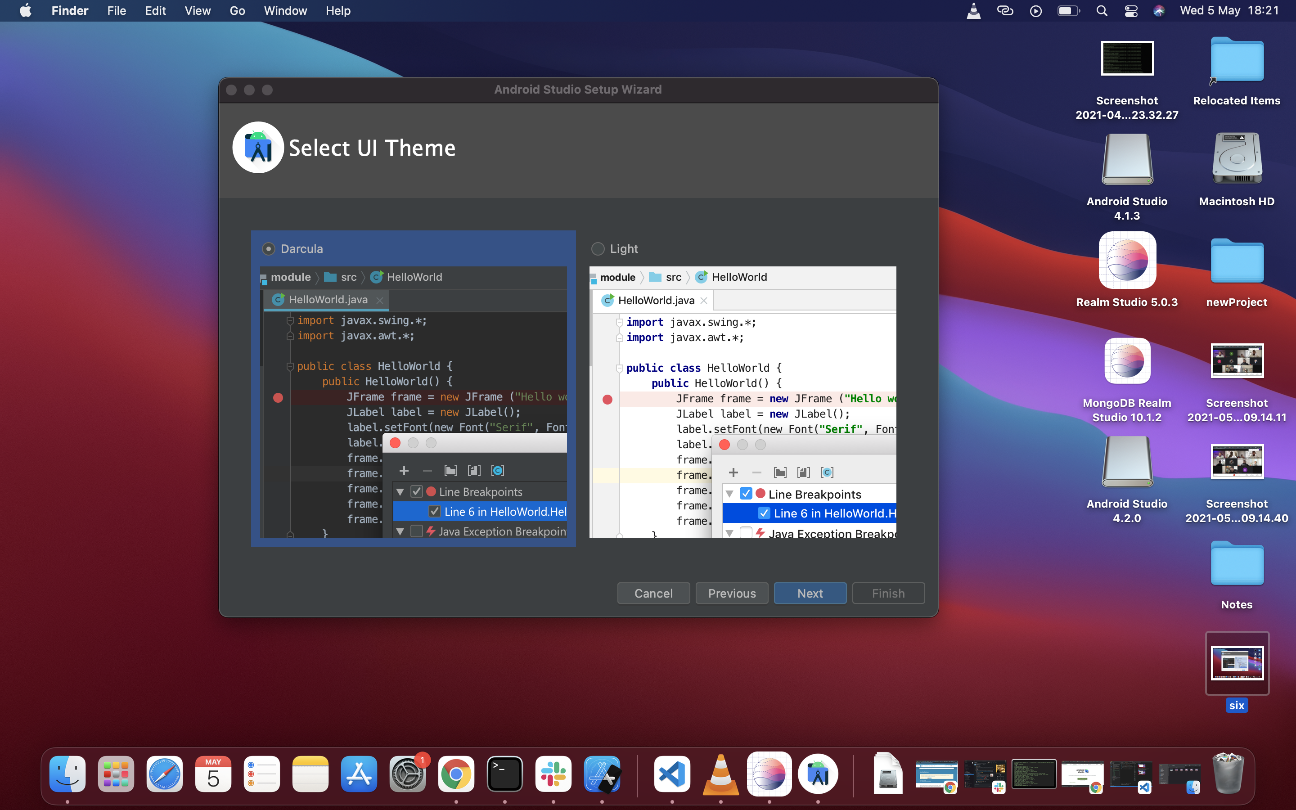
In this new page where it sets the path, click next and select preferred theme in the next page. I selected the Dracular dark theme
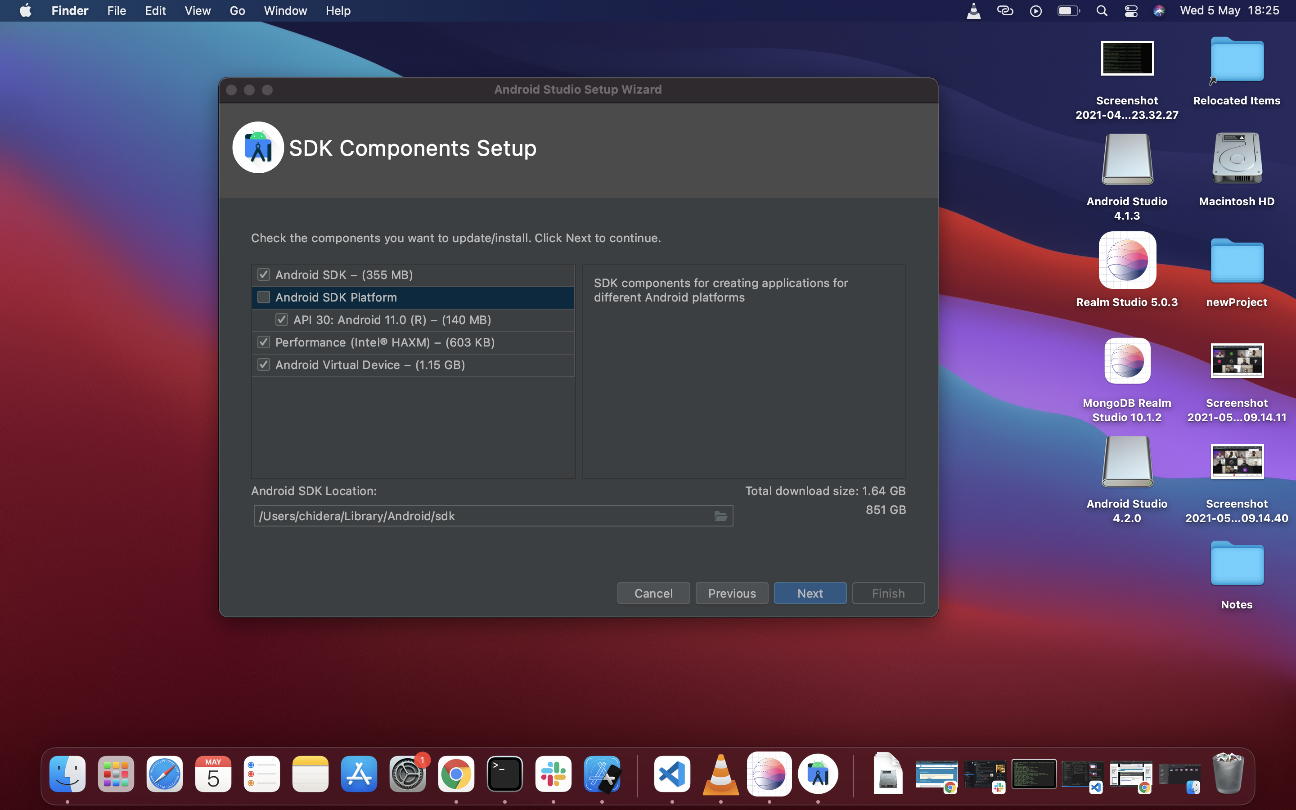
The next screen is the Android SDK setup components screen.
Ensure that Performance (Intel ® HAXM) option and Android Virtual Device option are selected then click Next button.
This takes you to the next screen, click Next without altering anything,

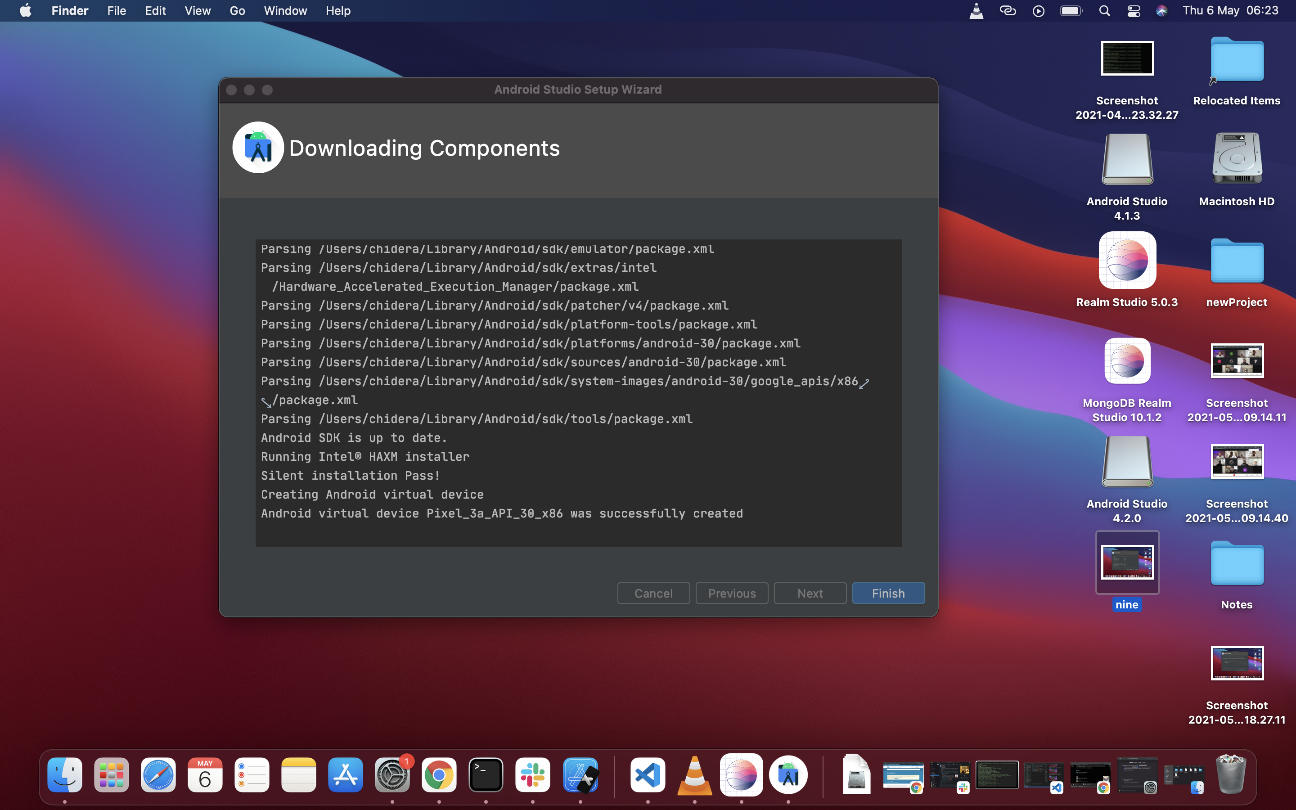
The final screen is this that shows the summary of the downloads it is about to make, click Finish to start the download
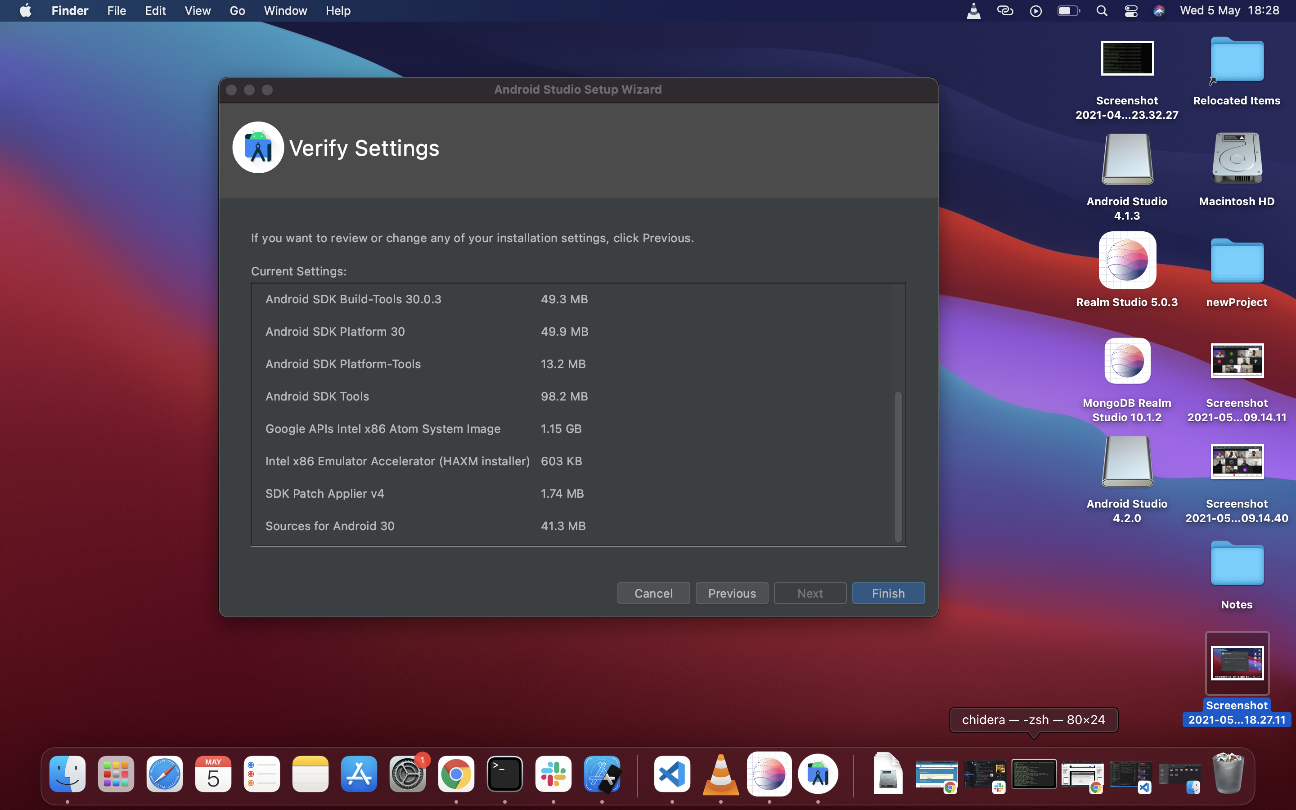
Once the download completes, click Finish on the next screen
Android SDK Configurattion
The next phase is now about SDK configuration. On the next screen, click on Configure on the right bottom and select SDK Manager
- The SDK Manager can also be found within the Android Studio "Preferences" dialog, under Appearance & Behavior → System Settings → Android SDK.
On the next screen click on Show Package Details at the bottom right
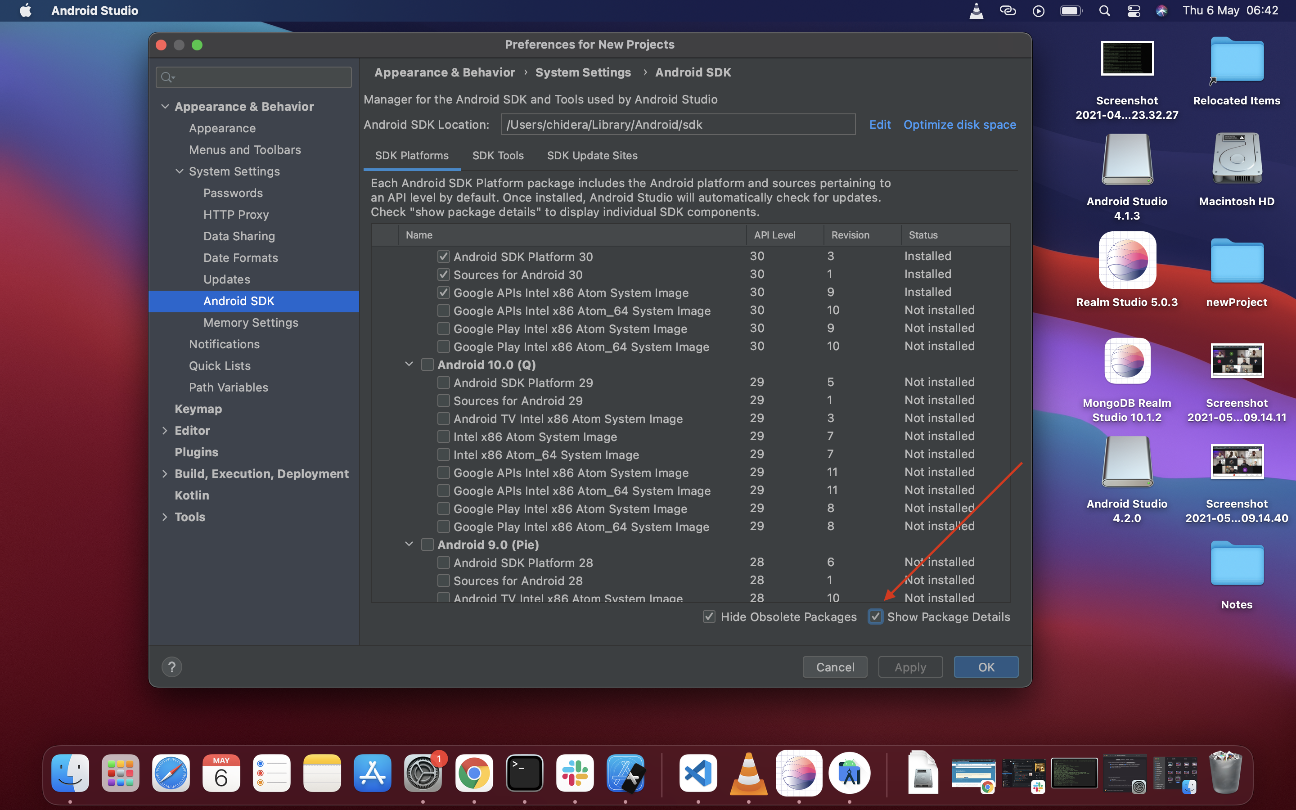
Then select the following, ensuring you're on the SDK Platforms tab:
- Android SDK Platform 29
- Intel x86 Atom_64 System Image
orGoogle APIs Intel x86 Atom System Image

Still on same screen, select SDK Tools tab and check the box next to "Show Package Details" here as well. Look for and expand the "Android SDK Build-Tools" entry, then make sure that 29.0.2 is selected and check the "Android SDK Command-line Tools (latest)".
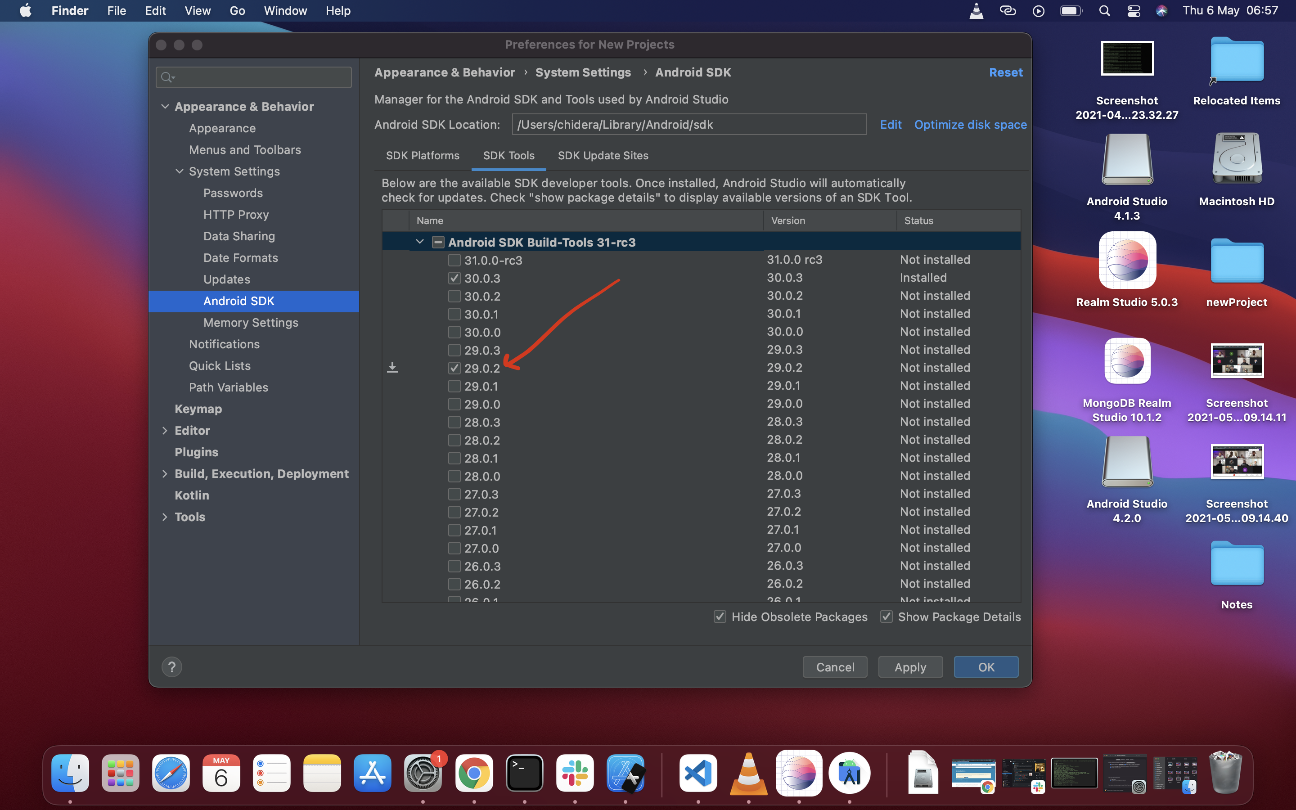
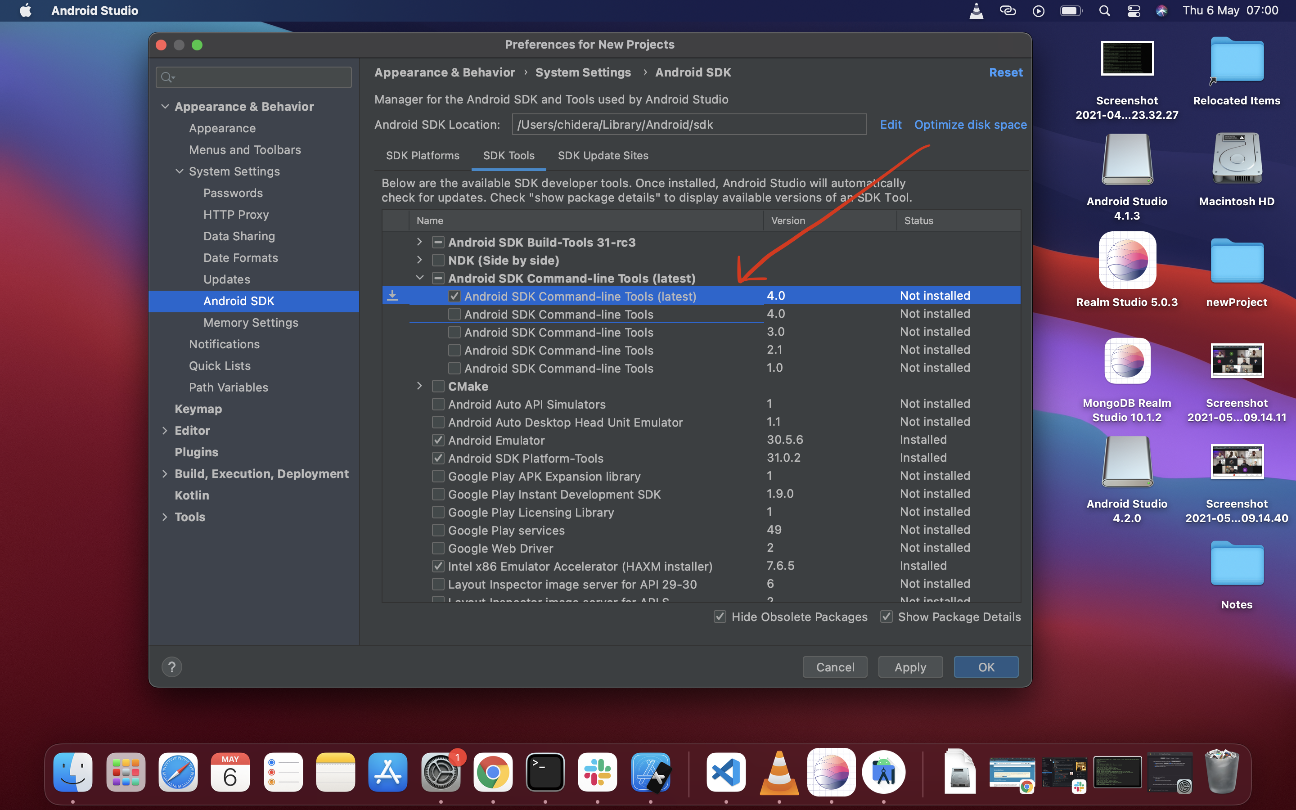
Finally, click "Ok" then click "Ok" on the next summary page, also accept the "License Agreement terms and conditions" then click on "Next" to download and install the Android SDK and related build tools.
Once it's finished downloading and unzipping, click Finish
Configure the ANDROID_HOME environment variable
What we want to do is to open $HOME/.zshrcto add environmental variables. If you’re using bash, it should be $HOME/.bash_profile or $HOME/.bashrc .
To open $HOME/.zshrc or $HOME/.bashrc, go to the terminal and type
$ vim ~/.zshrc
if you're using bash it should be
$ vim ~/.bashrc
this should open this vim page
export NVM_DIR="/Users/chidera/.nvm"
[ -s "$NVM_DIR/nvm.sh" ] && . "$NVM_DIR/nvm.sh"  # This loads nvm
~
~
~
~
"~/.zshrc" 3L, 104B
From your keyboard, click i to edit vim and you should get this
export NVM_DIR="/Users/chidera/.nvm"
[ -s "$NVM_DIR/nvm.sh" ] && . "$NVM_DIR/nvm.sh"  # This loads nvm
~
~
~
~
-- INSERT --
Copy and paste this code inside there
export ANDROID_HOME=$HOME/Library/Android/sdk
export PATH=$PATH:$ANDROID_HOME/emulator
export PATH=$PATH:$ANDROID_HOME/tools
export PATH=$PATH:$ANDROID_HOME/tools/bin
export PATH=$PATH:$ANDROID_HOME/platform-tools
And you should get this
export NVM_DIR="/Users/chidera/.nvm"
[ -s "$NVM_DIR/nvm.sh" ] && . "$NVM_DIR/nvm.sh"  # This loads nvm
export ANDROID_HOME=$HOME/Library/Android/sdk
export PATH=$PATH:$ANDROID_HOME/emulator
export PATH=$PATH:$ANDROID_HOME/tools
export PATH=$PATH:$ANDROID_HOME/tools/bin
export PATH=$PATH:$ANDROID_HOME/platform-tools
~
~
~
~
-- INSERT --
When you're done, press esc key, then press :wq + Enter to save your changes and that should be all.
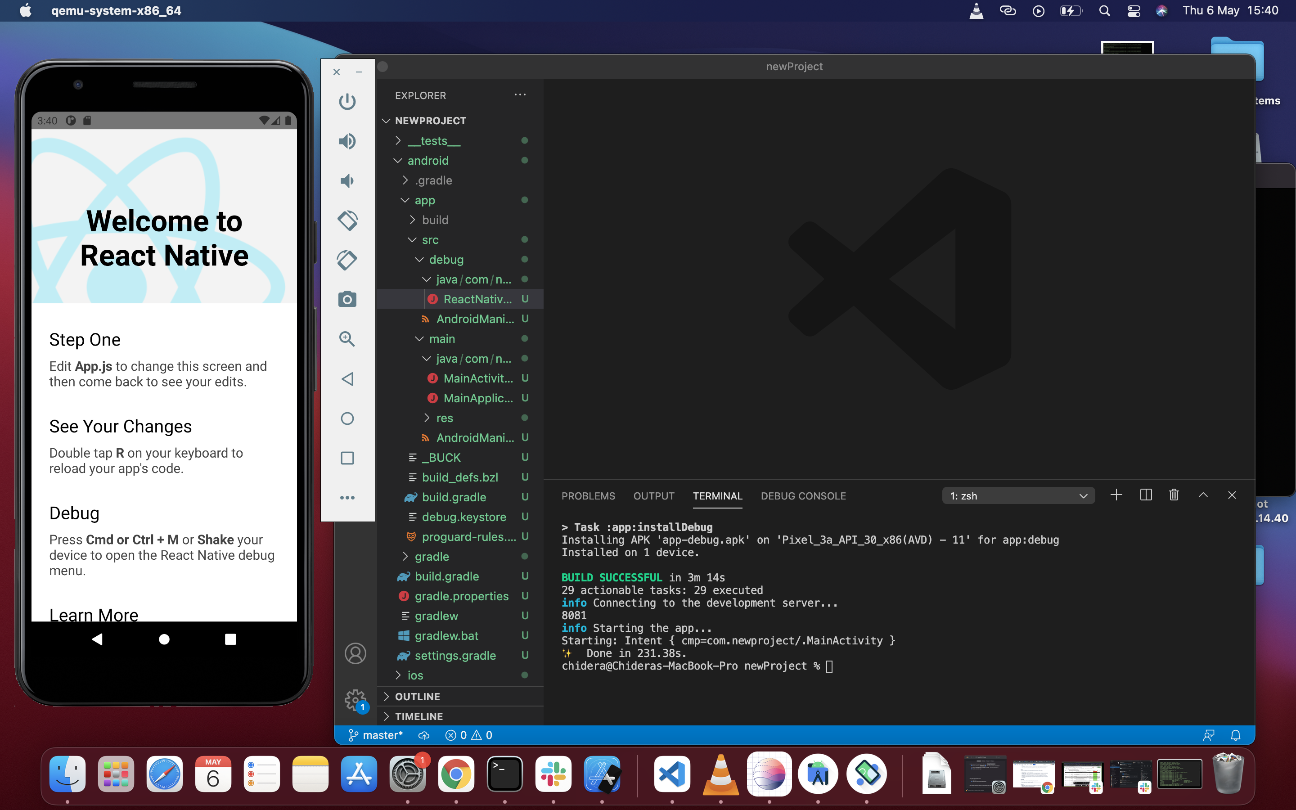
Start React Native App
Go to where you initialised a React Native App and in it's terminal, run
$ yarn android
Or
$ react-native run-android
Give it sometime to build and if successful, you should get your emulator up and running
You can also run your project from ios simulator
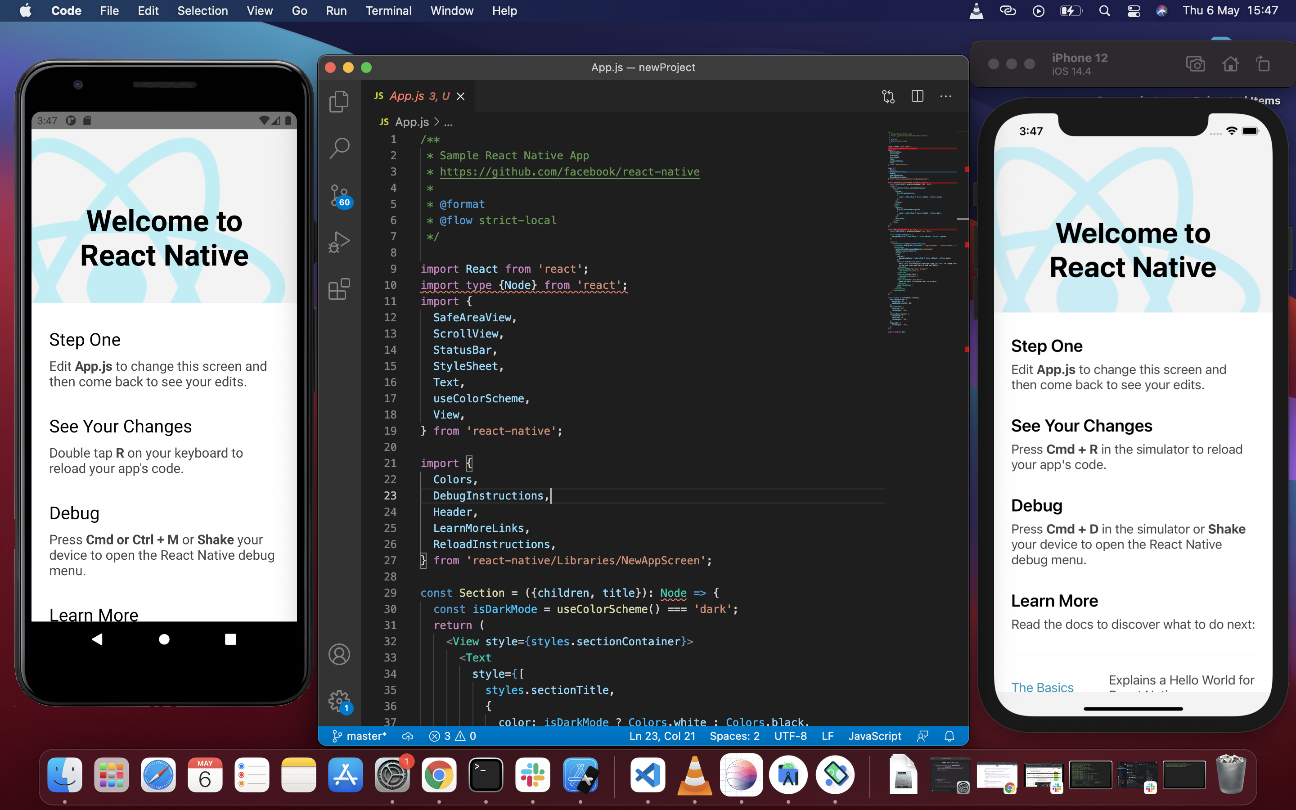
Congratulations!!! You've succeeded in setting up React Native on your MacBook to run both iOS and Android.
If you enjoyed this article, please Like, share and drop your comments .


